Are you looking for tips to help clean kitchen appliances?
When it comes to moving home, one of the major rooms in the house to tackle when cleaning is the kitchen.
Apart from emptying, packing and then cleaning all the cupboards in the kitchen, the last job is going to be the disconnection of all your appliances.
This job should be your last, as most of the appliances in the kitchen will be needed right up to the last minute.
We may take it for granted most of the time, but without a doubt, we rely heavily on our appliances and would be lost without them.
They are expensive to replace so when it comes to moving and cleaning them, it needs to be done properly and in a logical sequence.
Lifting things such as washing machines is heavy work, so there is also an element of safety awareness to consider.
Here are some tips and advice regarding how to clean and then move kitchen appliances safely to ensure there is no damage to either you or them.
Safety First
Moving appliances can be dangerous on a number of levels, even more so without the help of a professional mover.
If not dealt with carefully, it is easy to hurt yourself.
Sharp edges, back injuries, trapped fingers, slips and falls are just a few of the issues you want to avoid.
Always ensure that you don’t try and move heavy items on your own and that there are at least two people available to assist you at all times.
You also run the risk of damaging the appliance itself if you don’t secure and pack them properly.
Most importantly, water and electricity do not mix!
It is imperative that you switch off and remove the plugs from your appliances and that you keep them dry.
Cleaning the Appliances
No matter what you are moving, it needs to be clean and dry.
Your priority should be removing any residue, mildew or standing water.
Washing machines can give off a nasty smell if stored for a while as this allows any standing water time to stagnate.
Once you have given each a good clean you don’t need to worry about doing it once you are ready to re-install it into the new home.
Plus, keeping your appliances clean with regularly emptied filters extends their lifespan considerably.
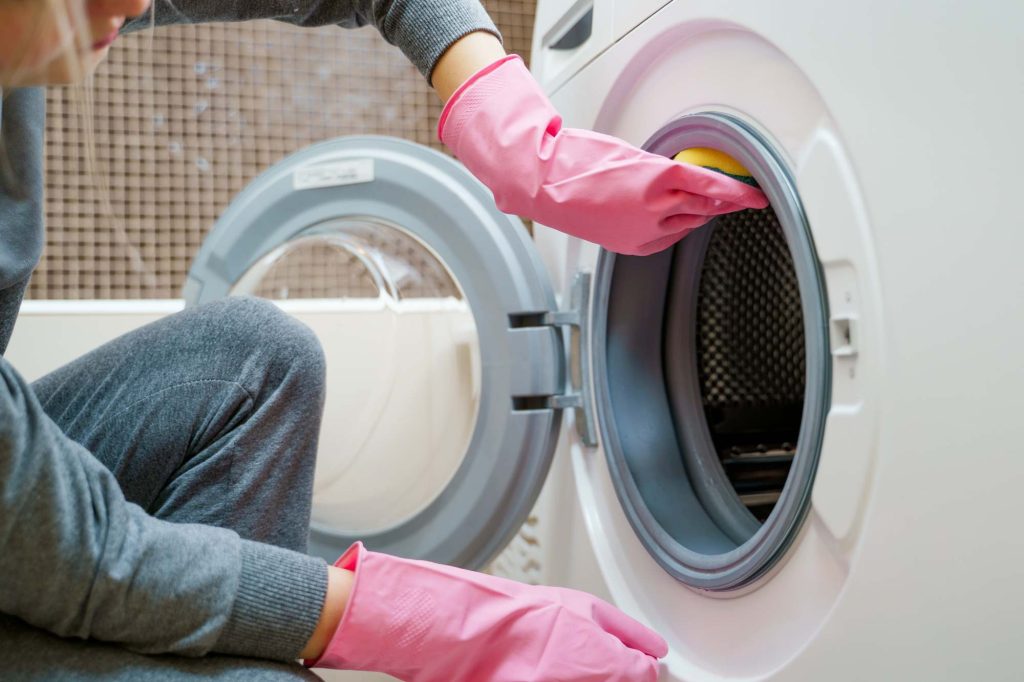
How to Clean and Move Your Washing Machine
Some appliances you can do without for a while, but the washing machine is not one of them!
If you have children, you will probably have the washing machine on every day. Dirty washing soon piles up.
This should be the last appliance to be dealt with. It will also be the first one you need upon arrival at the new house.
First, you need to unplug the machine and turn off the water supply.
TIP:
Have plenty of dry towels, a sponge, and a bucket ready in case of unexpected spills.
If the machine is free-standing moving it is easier. However, if it is built in, it is a little trickier to remove.
If possible, tilt the machine enough to be able to slide a piece of cardboard under it, just wide enough for the legs to stand on.
Alternatively, an old sheet will do. Then you can gently slide the machine out a few inches just far enough to disconnect the water hose.
Once it has been moved out completely, you can mop up and dry any visible water. That goes for inside the machine as well, don’t leave any water in the rubber seal of the door.
Take the soap dispenser out and give that a good wash with soapy water.
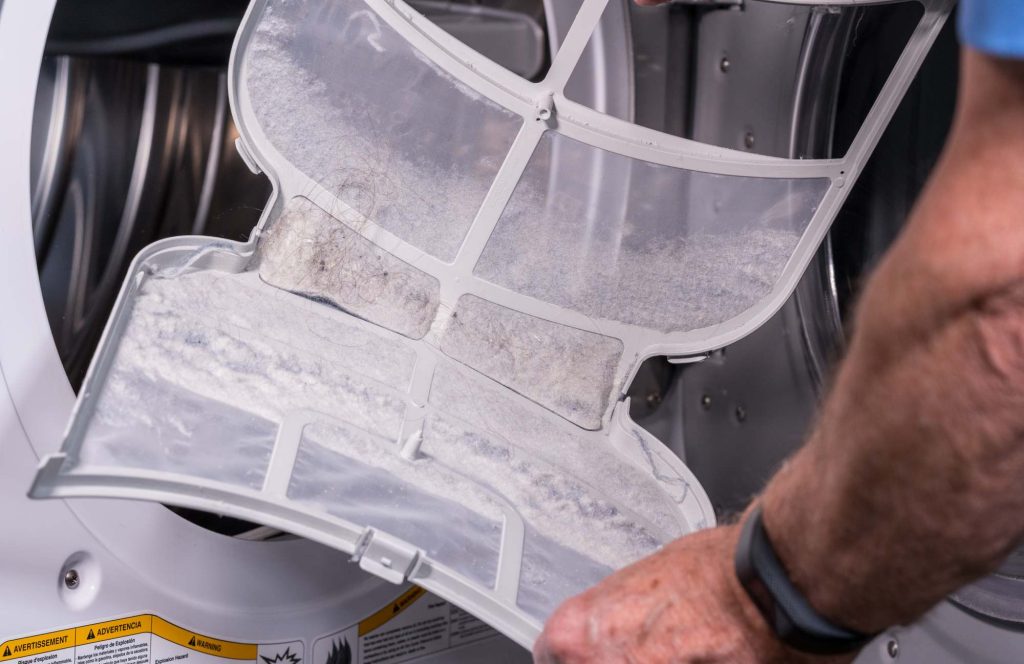
The filter should also be opened and cleaned as over time small items, fluff and fibres can accumulate blocking the effectiveness of the filter.
TIP:
Use an old toothbrush to really get into the hard-to-reach places both in the filter and soap dispenser.
You need to immobilise the drum before moving the machine.
When you buy a washing machine you will have been given a pack containing bolts and a bar which holds the drum steady and avoids damage.
If you don’t have these, you can call the manufacturer or perhaps your local home appliance store may be able to help.
Once secure, tape the electrical cord to the back of the machine to avoid tripping over it, cover it with a blanket to avoid scratches, and then it is ready to be loaded into your removal vehicle.
You may be using a professional removal company; in which case they will have a truck sack specifically designed for moving heavy appliances.
If you are undertaking a self-move, it is well worth investing in one or hiring one for the day.
It will come in handy for moving heavy boxes, items of furniture and other appliances as well.
How to Move and Clean Your Dishwasher
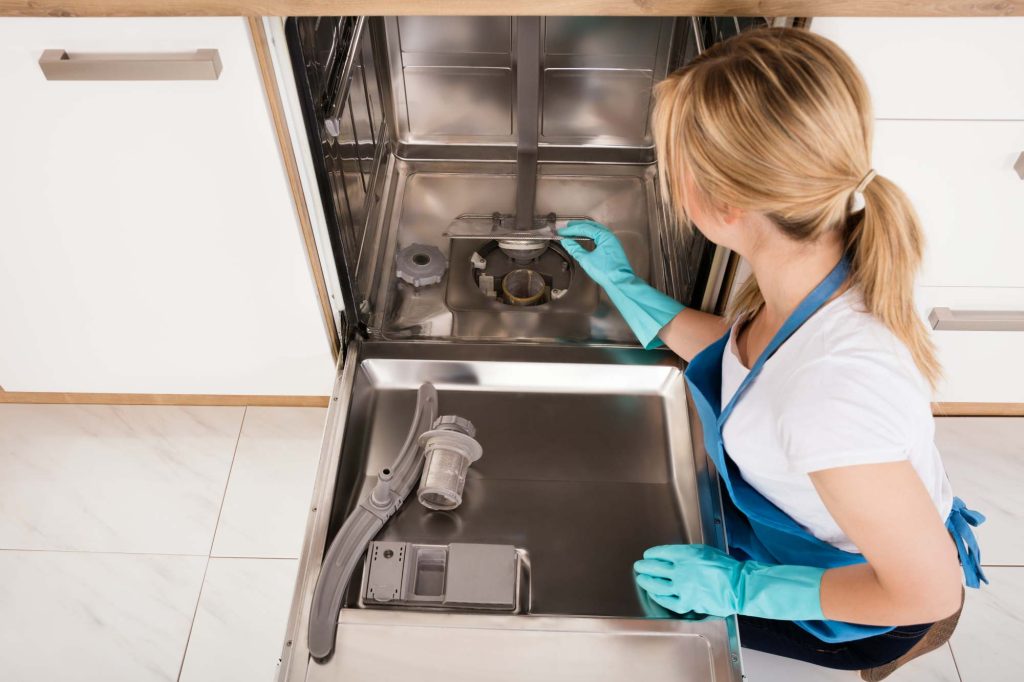
You can apply similar tactics to your dishwasher as you did with the washing machine.
Make sure the appliance is empty!
Before removal, buy a dishwasher cleaner and run it through the machine to really give it a deep clean.
In preparation for moving, you will need a towel, sponge, and bucket for any spills.
Disconnect the power and take out the plug.
Like the washing machine, use your sheet or piece of cardboard to gently ease the dishwasher out from under a counter, just far enough so that you can reach any connecting hoses.
Next, it’s time to turn your attention to the water. This step is simple enough: locate and shut off the water supply valve to stop any water from going into the unit.
Each dishwasher has two water lines: the water supply line and the drain line.
Remember that when you’re moving a dishwasher to a new home, you must disconnect both water lines before pulling the dishwasher out of its place under the kitchen counter.
TIP:
As you disconnect your dishwasher there will be several loose nuts, bolts, and screws that you will need to re-connect it later. Pop these into a small plastic bag and tape them securely to the side of the machine. When you are ready to install it into the new home, all you need is right there to hand.
Wrap the machine in a sheet, and it can be loaded into your removal vehicle.
How to Clean and Move Your Tumble Dryer
Tumbles are one of the easiest of all appliances to move and clean.
This is going to be the lightest piece of equipment in the kitchen.
However, it is still worth making it a two-man job.
Once the machine is out from under the counter and fully accessible, it will need to be hoovered.
Remove the filter and manually dispose of any gathered lint and debris.
Use your vacuum to really get into the meshing to ensure every bit of fluff has been removed.
Using the vacuum hose, hoover the inside door of the machine as well.
Driers can be prone to static and attract dust on the outer casing of the machine. A wipe with a damp cloth will collect this.
Remove any loose vents and place them inside the dryer so you can find them easily when you come to re-install them.
TIP: Get into the habit of cleaning your tumble dryer filter after every use. It reduces tumble time, so it will save you money and if a filter is overfull, it can overheat under the strain.
How to Clean and Move Your Freezer
Moving the freezer is a longer-term job and some planning is required.
Several weeks before the move, do your best to run down and empty as much of the contents as you can.
If time is getting short, ask a friend if you can pop what is left over in their freezer for a day or two.
Once completely empty you can switch off and leave it for a day to defrost.
Normally, this can take between 6 and 8 hours.
You could even do this step the night before you move, giving the refrigerator a wipe before you move it in the morning.
Once defrosted, get rid of any bits and pieces of food that may have spilt out and into the bottom of the freezer
You can then simply use a clean damp cloth to wipe all the walls and lid.
Use a de-greaser to wipe the outside of the appliance and then you can dry it.
As with your other white goods, cover the freezer with a sheet for protection in transit.
TIP:
If your move is a long one, or you are planning to put the freezer into a storage facility for a while, you should keep the doors slightly ajar so that it reduces the risk of mildew or mould growing inside.
This can be a very heavy appliance. If you have a large chest freezer it may take three or four strong people to move it safely to the removal vehicle.
How to Clean and Move Your Fridge
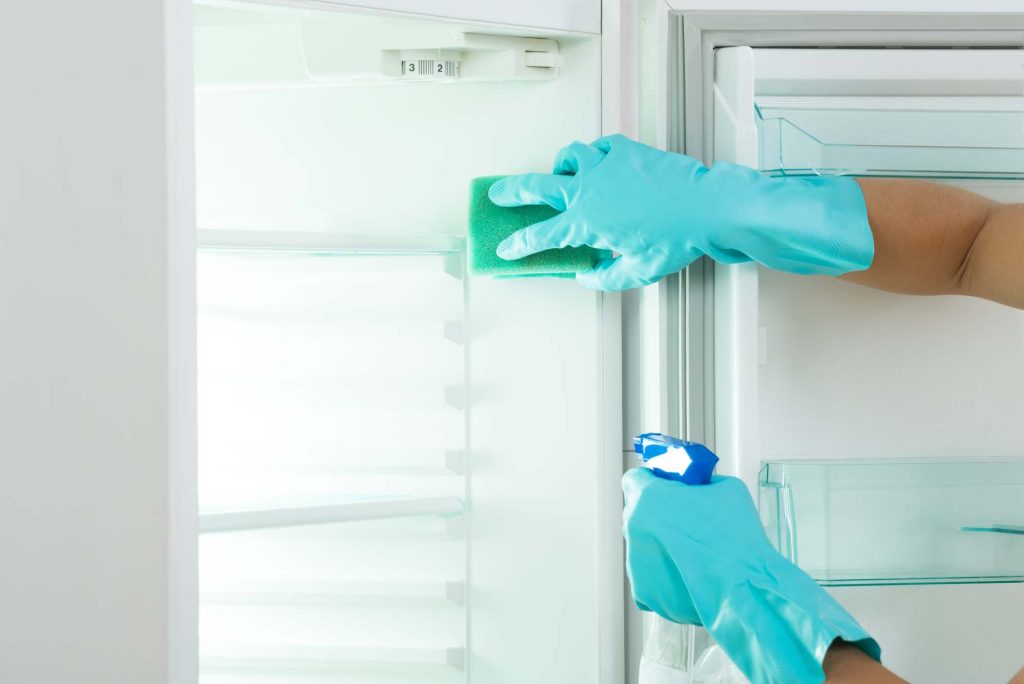
Your fridge will be needed right to the last minute but, a couple of days before you can remove the contents and wash all the glass shelving and vegetable drawers with mild detergent.
On move day, empty any contents still not used into a box. As you have already given it a good clean a few days beforehand, it will only require a quick wipe at this stage.
When empty, secure the shelving with Sellotape to that there is no movement during transit.
Alternatively, empty all the glass shelving out and cover them with bubble wrap before packing into a large box.
One thing to remember is that most manufacturers recommend you store and transport a refrigerator in an upright position and avoid tilting it as much as possible.
When you lie a fridge on its side, oil leaves the compressor, which can cause damage if the refrigerator is turned on before this is corrected.
Leave the appliance in an upright position for a few hours before plugging it back in.
TIP: For longer trips, using a large cooler box to temporarily store food for a couple of hours won’t cause anything to perish. Make sure you add some ice blocks and keep the lid firmly shut to keep the temperature at its lowest.
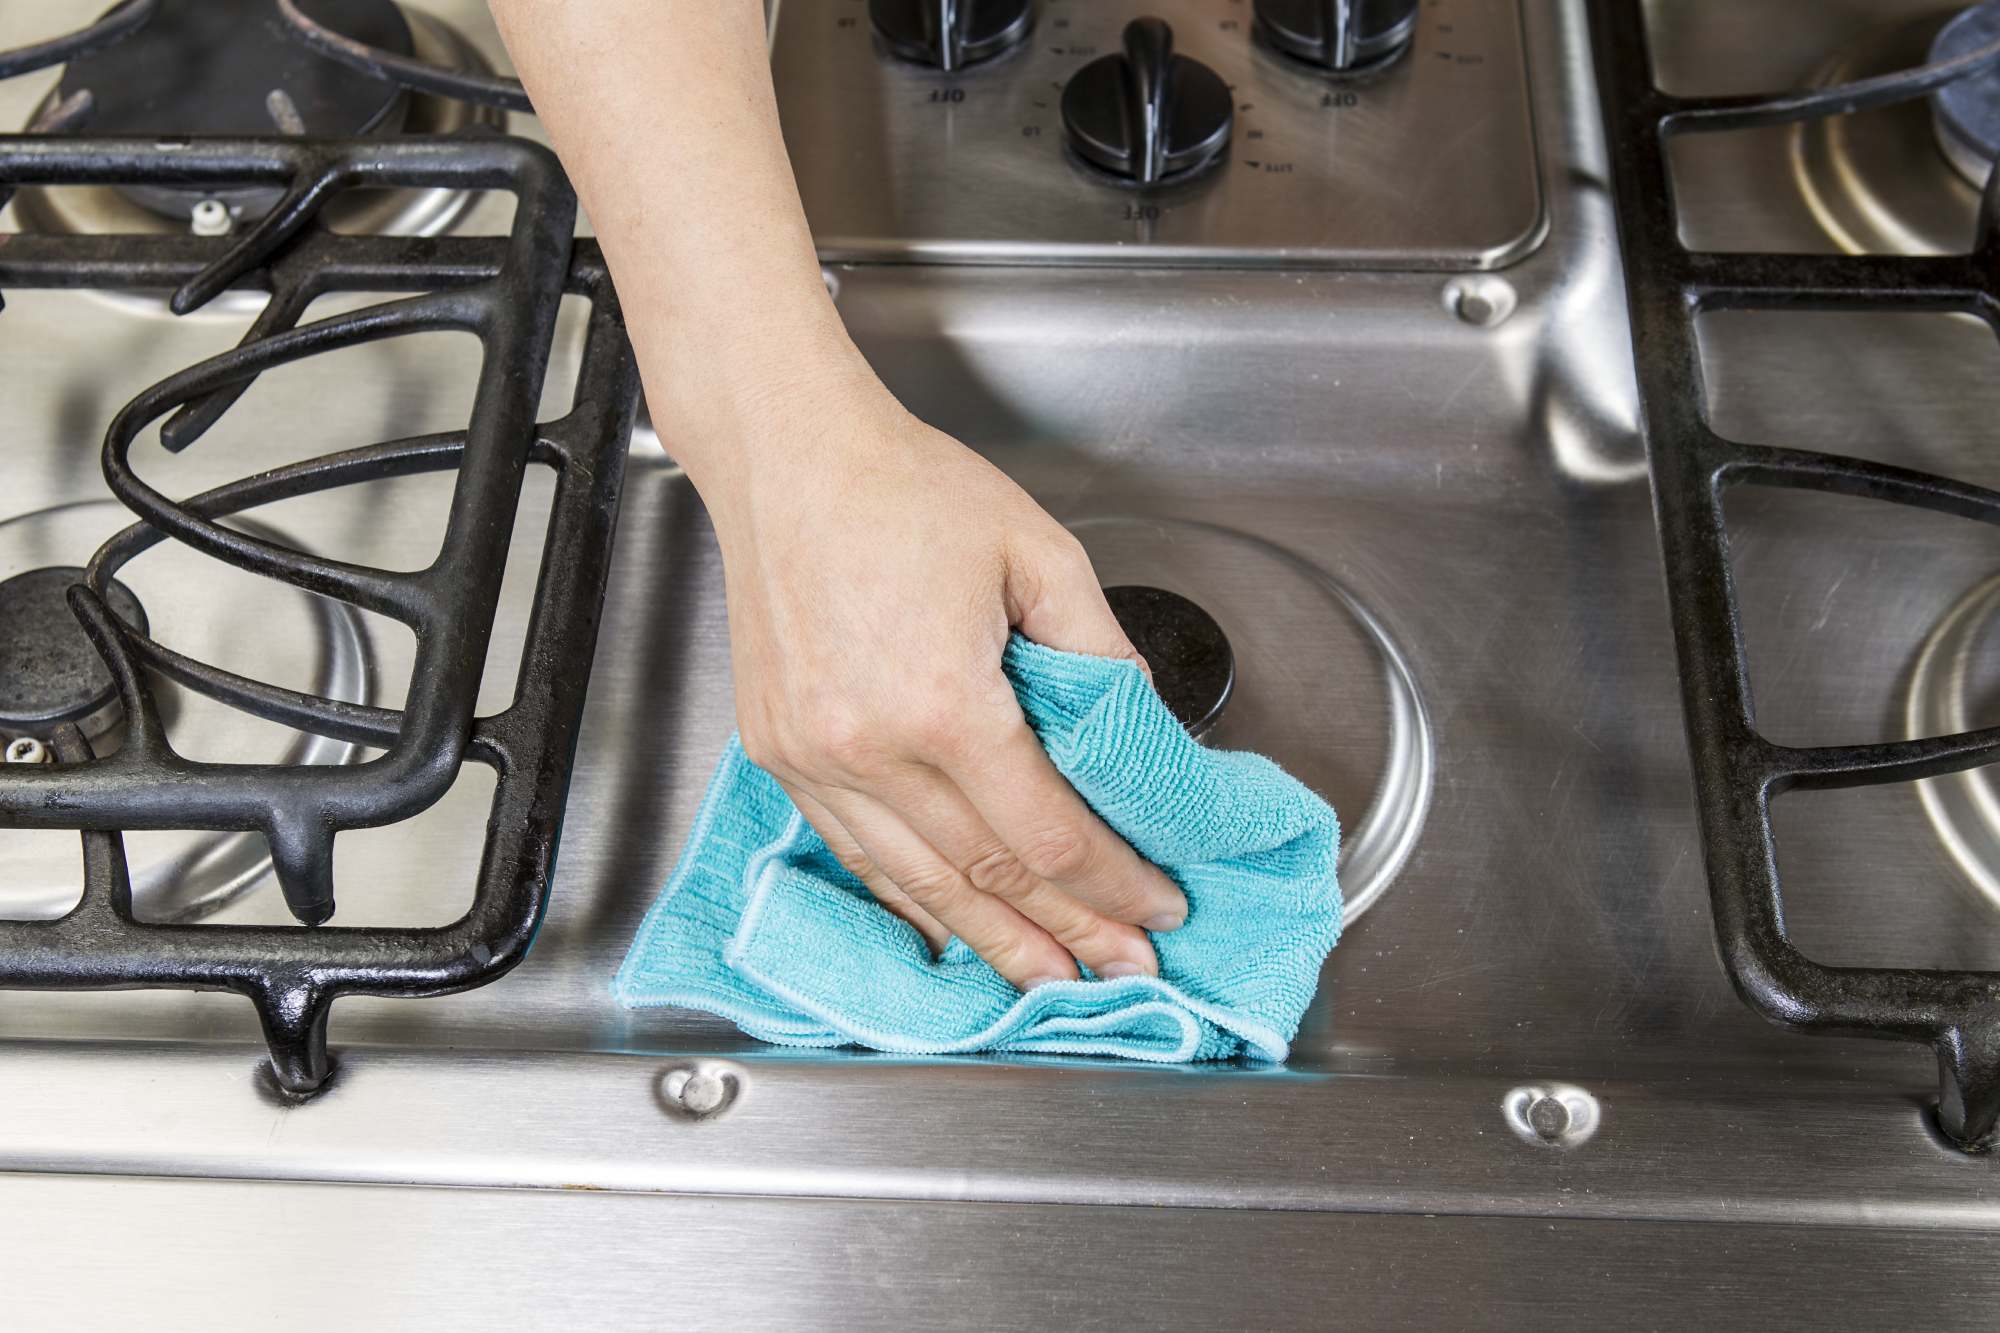
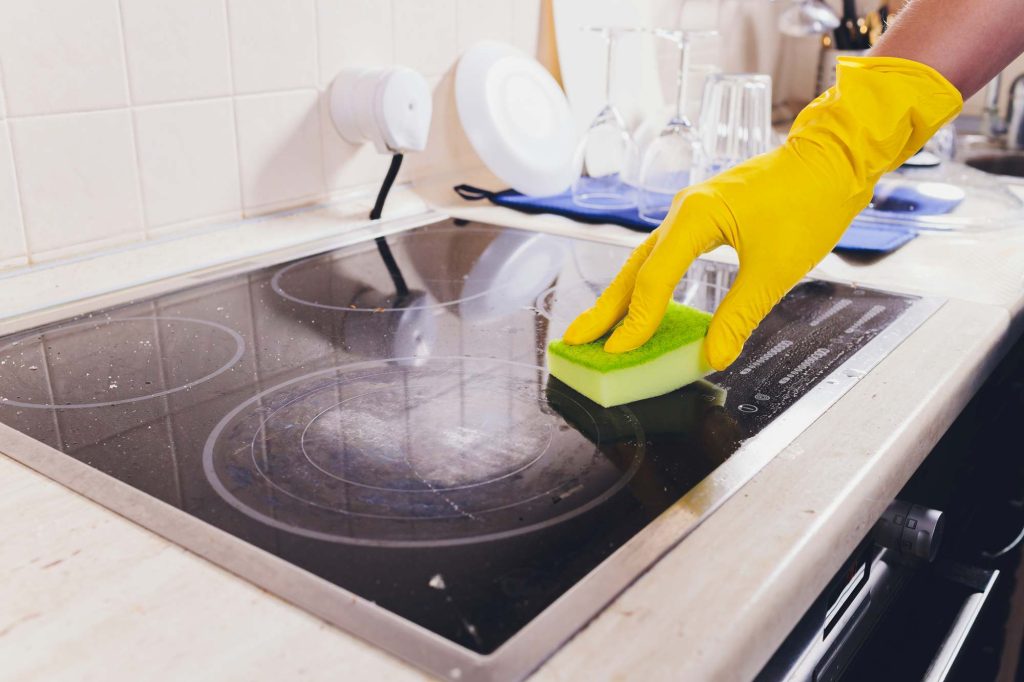
How to Clean and Move Your Cooker
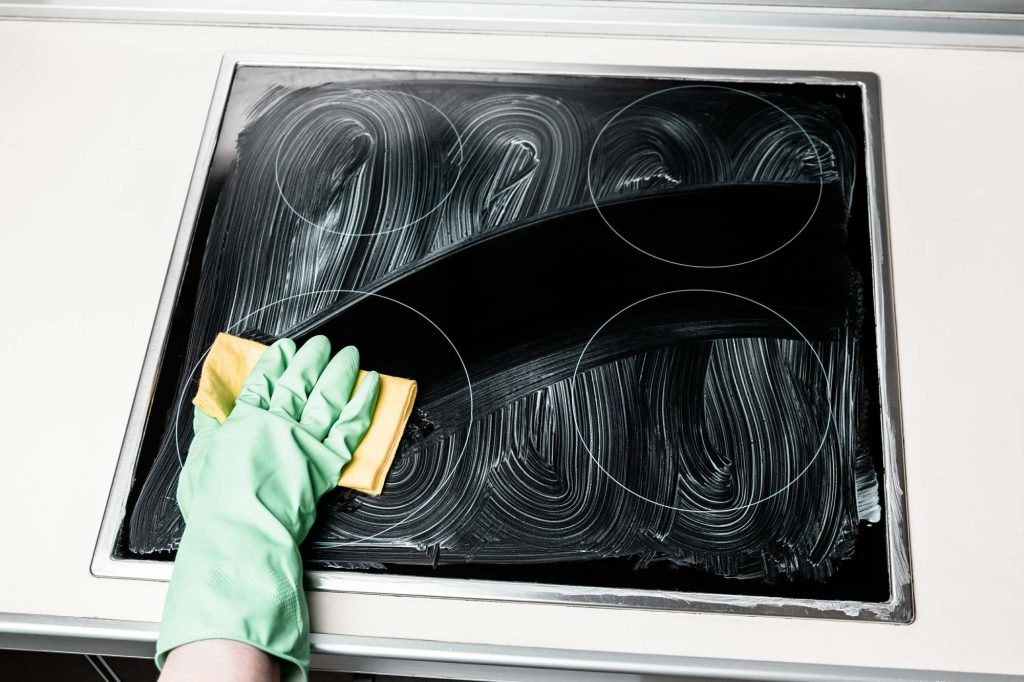
This item can often be the dirtiest and definitely the job most people hate doing the most.
You don’t want to arrive in your new home and place a messy oven in your new kitchen.
With so many other things to worry about when planning a house move, if you can afford it, it is well worth getting the professionals in to do the dirty work for you.
If not, a few days before the move you need to tackle the cleaning.
There are so many ways to clean an oven.
Off-the-shelf oven cleaners do the job well or you can check out one of the many websites online on how best to clean the cooker.
As ovens don’t generally get moved often, once out, you can get behind it and give the walls, floor, and sides of the oven a good once over leaving it clean and fresh for the new owners.
Take out the metal shelving and scrub. These can also be placed in a separate box before transportation.
The oven can be a very heavy object to move.
You don’t want to damage the kitchen flooring. Again, here it will be a two-man job to take out, pack and load the cooker into the removal vehicle.
TIP:
If you are not qualified to handle gas-powered appliances, it would be very unwise to try to connect or disconnect your cooker yourself. This is one task you will need professional help with, to make sure it is carried out in the safest way.
Arrival at your New Home
Once all the hard work of cleaning, loading, and unloading has been done, when you arrive at your new abode, all you have to do is to install your white goods in their rightful places.
Hopefully, you won’t have hurt yourself or sustained any damages to your appliances during transit and once re-connected you will have clean kitchen appliances ready for use.